Quantcast
Channel: Angular, Vue, React, Web Components, Javascript, HTML5 Widgets
Viewing all 306 articles
Browse latest View live

jQWidgets 4.2.1

$
0
0
This release resolves several issues which were reported by our users.

What’s Fixed:

- Fixed issues in Angular 2 and Typescript Examples.
- Fixed an issue in jqxScheduler regarding the legend area rendering.
- Fixed an issue in jqxScheduler regarding the auto-height behavior.
- Fixed an issue in jqxRibbon regarding the scrolling behavior.
- Fixed an issue in jqxProgressBar regarding the value updates.

The post jQWidgets 4.2.1 appeared first on Javascript, HTML5, jQuery Widgets.


Angular 2 RC 5

$
0
0
Angular 2

Angular 2 RC 5


We tested our Angular 2 Components with the latest version of Angular 2 – Angular 2 RC 5 and we are happy to share with you that we did not encounter any issues. Actually, what we see is better performance and loading time compared to previous Release Candidates. Below, you will find a sample systemjs.config.js which can be used with our Angular 2 samples. It is configured in such way that the latest version of Angular 2 is always used.
(function (global) {
    // map tells the System loader where to look for things
    var map = {
        'app': 'app', // 'dist',
        '@angular': 'https://npmcdn.com/@angular',
        'angular2-in-memory-web-api': 'https://npmcdn.com/angular2-in-memory-web-api',
        'rxjs': 'https://npmcdn.com/rxjs',
        'ts': 'https://npmcdn.com/plugin-typescript@4.0.10/lib/plugin.js',
        'typescript': 'https://npmcdn.com/typescript@1.8.10/lib/typescript.js'
    };
    // packages tells the System loader how to load when no filename and/or no extension
    var packages = {
        'app': { main: 'main.js', defaultExtension: 'js' },
        'rxjs': { defaultExtension: 'js' },
        'angular2-in-memory-web-api': { main: 'index.js', defaultExtension: 'js' },
    };
    var ngPackageNames = [
      'common',
      'compiler',
      'core',
      'forms',
      'http',
      'platform-browser',
      'platform-browser-dynamic',
      'router',
      'router-deprecated',
      'upgrade',
    ];
    // Individual files (~300 requests):
    function packIndex(pkgName) {
        packages['@angular/' + pkgName] = { main: 'index.js', defaultExtension: 'js' };
    }
    // Bundled (~40 requests):
    function packUmd(pkgName) {
        packages['@angular/' + pkgName] = { main: 'bundles/' + pkgName + '.umd.js', defaultExtension: 'js' };
    }
    // Most environments should use UMD; some (Karma) need the individual index files
    var setPackageConfig = System.packageWithIndex ? packIndex : packUmd;
    // Add package entries for angular packages
    ngPackageNames.forEach(setPackageConfig);

    var config = {
        // DEMO ONLY! REAL CODE SHOULD NOT TRANSPILE IN THE BROWSER
        transpiler: 'ts',
        defaultJSExtensions: true,
        typescriptOptions: {
            tsconfig: true
        },
        meta: {
            'typescript': {
                "exports": "ts"
            }
        },
        map: map,
        packages: packages
    }
    System.config(config);
})(this);
Try our Angular 2 Demos.

The post Angular 2 RC 5 appeared first on Javascript, HTML5, jQuery Widgets.

ASP .NET MVC Core Tag Helpers

$
0
0

What is a ASP .NET MVC Core Tag Helper?


Tag Helper enables server-side code to participate in creating and rendering HTML elements in Razor files.

What Tag Helpers provide?


In general, HTML-friendly experience. Razor markup using Tag Helpers looks like standard HTML. Front-end designers familiar with HTML/CSS/JavaScript can edit Razor without learning C# Razor syntax. ASP .NET MVC Core Tag Helpers make you more productive and able to produce more robust, reliable, and maintainable code using information only available on the server.

What is ASP .NET MVC Core Tag Helpers for Bootstrap?


This is a package we built for the community. It provides Tag Helpers for the popular Boostrap framework. The package includes the following list of tag helpers:

  • Alert
  • Badge
  • Breadcrumb
  • Button
  • Carousel
  • Collapse
  • DropDown
  • Input
  • Jumbotron
  • Label
  • ListGroup
  • Media
  • Modal
  • NavBar
  • PageHeader
  • Pagination
  • Panel
  • Popover
  • ProgressBar
  • Tabs
  • Thumbnail
  • Tooltip
  • Well


Demo link: http://aspcore.jqwidgets.com/bootstrap”
Project link: https://github.com/jqwidgets/ASP.NET-Core-MVC-Bootstrap-Tag-Helpers
Installation link: https://www.nuget.org/packages/jQWidgets.AspNetCore.Mvc.Bootstrap.TagHelpers

What additional Tag Helpers to expect soon?


In several weeks, we release ASP .NET Tag Helpers for jQWidgets. It includes Tag Helpers for all the widgets we have. The package will be included in the jQWidgets subscription. Here is how a sample with the Grid’s Tag Helper will look:

@model IEnumerable<jQWidgets.AspNet.Core.Models.Employee>
@{
ViewData["Title"] = "ASP .NET MVC Grid Example";
}
<jqx-grid theme="@ViewData["Theme"]" sortable="true" filterable="true" autoheight="true" width="850" source="Model">
<jqx-grid-columns>
<jqx-grid-column columngroup="name" datafield="FirstName" width="100" text="First Name"></jqx-grid-column>
<jqx-grid-column columngroup="name" datafield="LastName" width="100" text="Last Name"></jqx-grid-column>
<jqx-grid-column datafield="Title" width="150"></jqx-grid-column>
<jqx-grid-column datafield="Address" width="200"></jqx-grid-column>
<jqx-grid-column datafield="City" width="150"></jqx-grid-column>
<jqx-grid-column datafield="Country"></jqx-grid-column>
</jqx-grid-columns>
<jqx-grid-column-groups>
<jqx-grid-column-group name="name" text="Name"></jqx-grid-column-group>
</jqx-grid-column-groups>
</jqx-grid>

Demo link: Grid Tag Helper

The post ASP .NET MVC Core Tag Helpers appeared first on Javascript, HTML5, jQuery Widgets.

jQWidgets 4.3.0

$
0
0
This release brings Angular 2 Components with support for the final Angular 2 version. The updated demos can be found on Angular 2 Components demos.
Major part of the release is the ASP .NET Core MVC Tag Helpers package. During the last few months, we built a .NET library with Tag Helpers for all components. Each ASP .NET Tag helper has the same API members. This means that if you are familiar with the jQWidgets API, you already know how to use this .NET package. If you are not, please refer to the documentation page. The Tag Helpers enable Server-Side code to participate in creating and rendering HTML elements in Razor files. For more information about the package, please refer to: ASP .NET Core MVC Documentation and the Demo page: ASP .NET Tag Helpers.

What’s New:

– Angular 2.0 Final version support.
– ASP .NET Core MVC Tag Helpers.
– ASP .NET Core MVC Bootstrap Tag Helpers.

What’s Improved:

– jqxDateTimeInput, jqxNumberInput Esc key behavior.

What’s Fixed:

– Fixed an issue in jqxTabs regarding the changing of tab titles dynamically. – Fixed an issue in jqxWindow regarding the changing of its content dynamically. – Fixed an issue in jqxProgressBar regarding its text layout. – Fixed an issue in jqxLayout regarding its rendering. – Fixed an issue in jqxRibbon regarding the z-index of its scroll buttons.

The post jQWidgets 4.3.0 appeared first on Javascript, HTML5, jQuery Widgets.

Chart Studio

jQWidgets 4.4.0

$
0
0
This new release was focused entirely on improving the jQWidgets Angular 2 components and documentation. In this new release, you will also find multiple new examples about angular 2. Below is the list of changes:

- 30+ new examples for Angular 2.
- Angular 2 Web Pack support.
- Initialize jQWidgets Angular 2 Components through attributes.
- Angular 2 ngModel support.


View our Angular 2 Demos.

The post jQWidgets 4.4.0 appeared first on Javascript, HTML5, jQuery Widgets.

jQWidgets 4.5.0

$
0
0

What’s New:

– React UI components.

What’s Fixed:

– Fixed an issue in jqxGrid regarding the DateTimeInput editor in Firefox.
– Fixed an issue in jqxGrid regarding the Tab-key navigation when the Grid is in edit mode and the editor is checkbox.
– Fixed an issue in jqxGrid regarding the Esc key behavior when the NumberInput column is in edit mode.
– Fixed an issue in jqxGrid regarding the auto-scroll behavior after editing and when grouping is turned on.
– Fixed an issue in jqxGrid regarding the row details expand/collapse behavior after sorting and filtering.
– Fixed an issue in jqxGrid regarding the filter row’s date range filter display after the grid is re-rendered.
– Fixed an issue in jqxScheduler regarding the columns rendering in timeline views after navigation.
– Fixed an issue in jqxTreeGrid regarding the auto-height calculation after cell editing when autoRowHeight is true.
– Fixed an issue in jqxCalendar and jqxDateTimeInput regarding their destroy method.
– Fixed an issue in jqxMaskedInput regarding the value property during initialization.
– Fixed an issue in jqxChart regarding the tooltip’s z-index.

Breaking changes:

Component selectors for Angular now start with “jqx” instead of “angular”. ASP .NET Tag Helpers now use dash style instead of camel case for creating helpers and setting attributes.

The post jQWidgets 4.5.0 appeared first on Javascript, HTML5, jQuery Widgets.

Asp .Net Mvc Tag Helpers Docs


Bootstrap ASP .NET Core Mvc Tag Helpers

jQWidgets 4.5.1

$
0
0

What’s Improved:

– The jqxLayout/jqxDockingLayout “allowClose” setting in is now preserved when pinning tabbedGroups or unpinning autoHideGroups.

What’s Fixed:

– Fixed an issue in jqxNumberInput regarding mobile devices behavior when decimalSeparator is “,”.
– Fixed an issue in jqxScheduler regarding the exactTimeRendering functionality, when an appointment is rendered in 2 days.
– Fixed an issue in jqxScheduler regarding the edit dialog when the dialog is opened when there’s no focused cell.
– Fixed an issue in jqxPopover regarding the showArrowButton property, when it is set dynamically.
– Fixed an issue in jqxGrid regarding the tooltips in Checkbox column.
– Fixed an issue in jqxGrid regarding the clipboard paste functionality.
– Fixed an issue in jqxGrid regarding the toggle arrows display when the grid’s row details and grouping with aggregates features are enabled.
– Fixed an issue in jqxGrid regarding the grouping aggregates rendering logic.
– Fixed an issue in jqxGrid regarding the filter row dropdownlist and “select all” item.
– Fixed an issue in jqxGrid regarding the full row edit when “ESC” is pressed and “updaterow” is defined in the source object.
– Fixed an issue in jqxDataTable regarding the server-side filtering.
– Fixed an issue in jqxWindow regarding the dynamic enabling/disabling of window dragging.
– Fixed an issue in jqxWindow regarding the Tab key navigation after closing modal window.
– Fixed an issue in jqxTabs regarding the setTitleAt method when close buttons are enabled.
– Fixed an issue in jqxRibbon about the animationType: “slide”.
– Fixed an issue in jqxWindow regarding the method “destroy” in Internet Explorer.


The post jQWidgets 4.5.1 appeared first on Javascript, HTML5, jQuery Widgets.

Understanding How Webpack Works

$
0
0

Understanding How Webpack Works


Webpack is a module bundler. It takes disparate dependencies, creates modules for them and bundles them into manageable output files. This is especially useful for Single Page Applications (SPAs), which is the defacto standard for Web Applications today

Initial Configuration


For start we need to tell Webpack our application entry and output points
     
    var path = require('path');
    module.exports = {
        entry: './src/index.js',
        output: {
            path: path.resolve(__dirname, './dist/),
         filename: 'bundle.js
        }
    }
entry: This is the main entry point of our application. This is where our initial loading and application logic will be output.path: An absolute path for the resulting bundle. We use a built-in Node.js function (path) to dynamically create an absolute path, relative to where we are output.filename: The filename of the resulting bundle. This can be anything, but by convention it’s called bundle.js __dirname: This is the directory name of the current file.

Loaders


In most of the occasions our project source files are HTML, CSS , JS/TS. Webpack understands JavaScript from the box, but what about the other file types? Here are the most common Webpack loaders for this files types: TypeScript

     
    {
        test: /\.ts$/,
        loaders: ['awesome-typescript-loader', 'angular2-template-loader?keepUrl=true']
    }
test: File type to look for. We provide a regex expression that will match .ts files loaders: The loader to use HTML

     
    {
        test: /\.html$/,
        use: 'raw-loader'
    }
test: File type to look for. We provide a regex expression that will match .html files use: The loader to use CSS

 
    {
        test: /\.css$/,
        loaders: ['style-loader', 'css-loader']
    }
 
test: File type to look for. We provide a regex expression that will match .css files loaders: The loaders to use. Webpack processes Loaders from right to left, so the results of css-loader (the file contents) are passed to style-loader (adding the styles to the HTML document) Important: In order to use this loaders we need to have their dependencies installed. For more info about loaders please visit Webpack Official Page

Plugins


They serve the purpose of doing anything else that a loader cannot do. Here is an example:

     
    plugins: [
        new webpack.ProgressPlugin(),
        new webpack.ContextReplacementPlugin(
            resourceRegExp,
            [newContentResource],
            [newContentRecursive],
            [newContentRegExp]
        )      
    ]
ProgressPlugin: This plugin extracts progress information ContextReplacementPlugin: If the resource (directory) matches resourceRegExp, the plugin replaces the default resource, recursive flag or regExp generated by parsing with newContentResource, newContentRecursive or newContextRegExp respectively. If newContentResource is relative, it is resolve relative to the previous resource For more info about plugins please visit Webpack Official Page

Resolve


Here you can change how modules are resolved. Webpack provides reasonable defaults, but it is possible to change the resolving in detail. Example:
    
    resolve: {
        extensions: ['.ts', '.js']
    }
This automatically resolves certain extensions which is what enables users to leave off the extension when importing:
 
    import File from '../path/to/file'
 
For more info about resolve please visit Webpack Official Page

Full Example


    'use strict';
    let path = require('path');
    let webpack = require('webpack');
 
    module.exports = {
        entry: './app/main.ts',
 
        output: {
            path: path.resolve(__dirname + '/dist'),
            filename: 'bundle.js'
        },
 
        module: {
            loaders:
            [
                {
                    test: /\.ts$/,
                    loaders: ['awesome-typescript-loader', 'angular2-template-loader?keepUrl=true']
                },
                {
                    test: /\.htm$/,
                    use: 'raw-loader'
                },
                {
                    test: /\.css$/,
                    loaders: ['style-loader', 'css-loader']
                }
            ]
        },
 
        plugins: [
            new webpack.ProgressPlugin(),
            new webpack.ContextReplacementPlugin(
                /angular(\\|\/)core(\\|\/)@angular/,
                path.join(process.cwd(), 'app')
            )
        ],
 
        resolve: {
            extensions: ['.ts', '.js']
        }
    };

The post Understanding How Webpack Works appeared first on Javascript, HTML5, jQuery Widgets.

How to use Webpack with Angular 4

$
0
0
Webpack roams over your application source code, looking for import statements, building a dependency graph, and emitting one or more bundles. With plugins and rules, Webpack can preprocess and minify different non-JavaScript files such as TypeScript, SASS, and LESS.

Initial Configuration


For start we need to tell Webpack our application entry and output points


    var path = require('path');
    module.exports = {
        entry: {
            appPart1: './src/appPart1.ts',
            appPart2: './src/appPart2.ts',
        }
        output: {
            path: path.resolve(__dirname, './dist/),
            filename: '[name].bundle.js'
        }
    }


entry: Webpack gets two files for entry
output.path: Webpack outputs both files to ‘./dist’ folder located in our root folder
output.filename: Webpack names both files according to their entry

In most cases you will have only 1 entry file – main.ts, from which Webpack will get to all needed other files.

Loaders


Angular is writter in TypeScript and supports external templates and styles.
    
    @Component({
        selector: 'app-root',
        templateUrl: './app.component.html',
        styleUrls: ['./app.component.css']
    })
But the browser alone don`t understand that. So we must get all of this into one(or several if the app is big) JavaScript file/s. We do that by using Webpack Loaders. Here are the most common used with Angular:

TypeScript


    {
        test: /\.ts$/,
        loaders: ['awesome-typescript-loader', 'angular2-template-loader?keepUrl=true']
    }

HTML


    {
        test: /\.html$/,
        use: 'raw-loader'
    }

CSS


    {
        test: /\.css$/,
        loaders: ['style-loader', 'css-loader']
    }
 

test: File type to look for. We provide a regex expression that will match the required files

loaders/use: The loaders to use
Webpack processes Loaders from right to left, so the results of css-loader (the file contents) are passed to style-loader (adding the styles to the HTML document)
Important: In order to use this loaders we need to have their dependencies installed.
For more info about loaders please visit Webpack Official Page

Full Example


    'use strict';
    let path = require('path');
    let webpack = require('webpack');
 
    module.exports = {
        entry: './app/main.ts',
 
        output: {
            path: path.resolve(__dirname + '/dist'),
            filename: 'bundle.js'
        },
 
        module: {
            loaders:
            [
                {
                    test: /\.ts$/,
                    loaders: ['awesome-typescript-loader', 'angular2-template-loader?keepUrl=true']
                },
                {
                    test: /\.htm$/,
                    use: 'raw-loader'
                },
                {
                    test: /\.css$/,
                    loaders: ['style-loader', 'css-loader']
                }
            ]
        },
 
        plugins: [
            new webpack.ProgressPlugin(),
            new webpack.ContextReplacementPlugin(
                /angular(\\|\/)core(\\|\/)@angular/,
                path.join(process.cwd(), 'app')
            )
        ],
 
        resolve: {
            extensions: ['.ts', '.js']
        }
    };
 

The post How to use Webpack with Angular 4 appeared first on Javascript, HTML5, jQuery Widgets.
How to use Webpack with React

$
0
0
Webpack is an amazing tool for processing and bundling together all of your project modules.

Initial Webpack Configuration


For start we need to tell Webpack our application entry and output points


    module.exports = {
        entry: {
            myApp: __dirname + '/src/app.js',
        }
        output: {
            path: __dirname + '/build',
            filename: '[name].bundle.js'
        }
    }

entry: Webpack gets one file for entry
output.path: Webpack outputs file to ‘./build’ folder located in our root folder
output.filename: Webpack names both files according to their entry
In most cases you will have only 1 entry file, from which Webpack will get to all needed other files. But it is possible to have more than one.

Loaders

Babel

Babel is a platform for JavaScript compilation and tooling. It’s a powerful tool that, among other things, let you: Use next versions of JavaScript (ES6 / ES2015, ES7 / ES2016, etc.), not yet fully supported in all browsers. Use JavaScript syntax extensions, such as React’s JSX.
Babel is a stand alone tool, but it can be used as a loader and pair very well with Webpack.

     
    {
        test: /.js?$/,
        loader: 'babel-loader',
        exclude: /node_modules/,
        query:
        {
            presets: ['es2015', 'react']
        }
    }

test: A regular expression that matches the file extensions that should run through this loader (Required).
loader: The name of the loader (Required).
include / exclude: Optional setting to manually set which folders and files the loader should explicitly add or ignore.
query: The query setting can be used to pass Additional options to the loader.
There are a lot of more loaders like css or json and you must add them here if you need them in your project.
Important: In order to use this loaders we need to have their dependencies installed.
For more info about loaders please visit Webpack Official Page

Plugins

They serve the purpose of doing anything else that a loader cannot do.
Here are some examples:

DefinePlugin
  
    new webpack.DefinePlugin
    ({
        'process.env':
        {
            'NODE_ENV': JSON.stringify('production')
        }
    })

The DefinePlugin allows you to create global constants which can be configured at compile time. This can be useful for allowing different behavior between development builds and release builds.

UglifyJsPlugin
 
   new webpack.optimize.UglifyJsPlugin
   ({
       mangle: true,
       sourcemap: false,
       compress: { warnings: false }
   })

This plugin adds support for the UglifyJS Features.

Full Example

     
    var path = require('path');
    var webpack = require('webpack');
    module.exports =
    {
        entry:
        {
            myApp: __dirname + '/src/app.js',
        },
 
        output:
        {
            path: __dirname + '/build',
            filename: '[name].bundle.js'
        },
 
        module:
        {
            loaders:
            [{
                test: /.js?$/,
                loader: 'babel-loader',
                exclude: /node_modules/,
                query:
                {
                    presets: ['es2015', 'react']
                }
            }]
        },
 
        plugins:
        [
            new webpack.DefinePlugin
            ({
                'process.env':
                {
                    'NODE_ENV': JSON.stringify('production')
                }
            }),
            new webpack.optimize.UglifyJsPlugin
            ({
                mangle: true,
                sourcemap: false,
                compress: { warnings: false }
            })
        ]
    };
 

The post How to use Webpack with React appeared first on Javascript, HTML5, jQuery Widgets.
React Grid

$
0
0
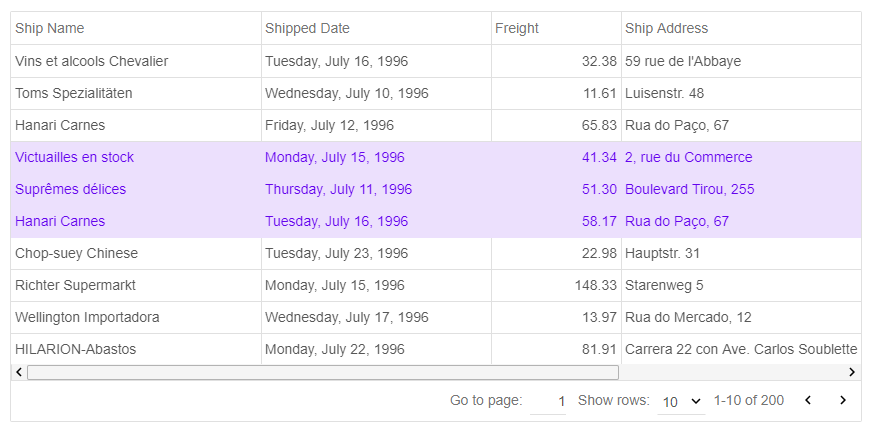
jQWidgets React Grid component represents an unique and feature complete UI Grid component built on top of ReactJS and the jQWidgets framework. Our React Grid component is fast, it has many enterprise features such as:

  • Grid Data Export
  • Grid Data Print
  • Conditional Cells Formatting
  • Cells and Full Row Edit
  • Server side operations
  • Grid Sorting
  • Grid Filtering
  • Grid Grouping
  • Grid Paging


Demos page and sources: React Grid

The post React Grid appeared first on Javascript, HTML5, jQuery Widgets.

jQWidgets 4.5.2


Angular Grid

$
0
0

Angular Grid UI Component


jQWidgets Angular Grid is an advanced data grid user interface component built on top of Typescript, Angular and the jQWidgets framework. It is feature complete and is built by the same developers who implemented the best Javascript Grid – jqxGrid. With our Angular Grid, you can use the same API and functionalities.

GREAT PERFORMANCE


jqxGrid offers fast data updates on all end-user features such as grouping, sorting, paging, and scrolling. The Angular Grid also comes with row and column virtualization, which minimizes the amount of items that need to be rendered, and ensures unbeatable performance in spread-like scenarios with thousands of rows and columns.

UNIQUE FLEXIBILITY


jqxGrid is developed on top of the jQWidgets UI Framework and delivers a combination of unique features which can be easily enabled, disabled or customized. Our Angular Grid provides the ultimate flexibility over your data and its presentations including paging, grouping and sorting.

SORTING


The Angular Grid supports built-in powerful sorting capabilities like one-click automatic sorting, selection of sort option from a context menu, and sorting through APIs. The data grid automatically chooses the most appropriate comparison. Users can also implement and use a custom sort comparer. The sorting works well with all possible configurations including rows grouping and paging. Angular Grid also has an option to display an additional background in the sorted column.

Some of the other supported features by our Angular Grid are: Filtering, Paging, Grouping, Nested Grids, Pinned(Frozen) Columns, Conditional Formatting, Cells Editing, Row Editing, Data Validation and many more.


Lets start with a simple Angular Grid setup:

Template:
    <jqxgrid [width]="500" [source]="dataAdapter" [columns]="columns">
</jqxgrid>


Component:

    export class AppComponent {
//This generates some random array with data
data: any[] = generatedata(100);
source: any =
{
localdata: this.data,
datafields:
[
{ name: 'firstname', type: 'string' },
{ name: 'lastname', type: 'string' },
{ name: 'price', type: 'number' }
],
datatype: 'array'
};
dataAdapter: any = new $.jqx.dataAdapter(this.source);
columns: any[] =
[
{ text: 'First Name', datafield: 'firstname', width: 200 },
{ text: 'Last Name', datafield: 'lastname', width: 200 },
{ text: 'Unit Price', datafield: 'price', cellsalign: 'right', cellsformat: 'c2' }
];
}


As you can see we can either directly assign value to the property like with the width or we can use a property from our component class – source & columns.

And here is the result:

angular grid

Now let’s add some features to the Angular Grid:

    <jqxgrid [width]="500" [source]="dataAdapter" [columns]="columns"
[pageable]="true" [editable]="true" [filterable]="true" [autoheight]="true">
</jqxgrid>


The code in AppComponent stays the same(as above Component example), because we don’t have anything new we need from there. This looks like this:

Editing Feature:

angular grid editing

Paging Feature:

jQWidgets Angular Grid has integrated paging functionality that lets the users to view large data sets in multiple pages for faster loading and intuitive navigation. Users also have an option to select how many records they would like to see on a page by using a page-size dropdown. To navigate to a page, users can enter the page number in the page-input box and click the ‘enter’ key or they can click the ‘next’ and ‘previous’ navigation buttons to navigate to the next or the previous page.

angular grid paging

Filtering Feature:

angular grid filtering

Every event you have in the normal jqxGrid is available in Angular Grid too. All you need to do is write on before it and upperCase it’s first letter.

You bind it like this:

 <jqxgrid (onCellbeginedit)="cellBeginEditEvent($event)"
[width]="500" [source]="dataAdapter" [columns]="columns">
</jqxgrid>


The Angular Grid by jQWidgets is fast and easy to use. It works across devices and has a consistent look and behavior on PCs, tablets and mobile phones. It is a perfect solution for complex Angular UI applications.

Browser our Grid demos: http://www.jqwidgets.com/angular/angular-grid/

The post Angular Grid appeared first on Javascript, HTML5, jQuery Widgets.

jQWidgets 4.5.3

$
0
0

jQWidgets v4.5.3 Release, June-01-2017


What’s Fixed:


– Fixed an issue in jqxGrid regarding the data editing when the edit mode is ‘selectedrow’ and selection mode is cell based.
– Fixed an issue in jqxGrid regarding loading dates with milliseconds precision.
– Fixed an issue in jqxGrid regarding the destroy method when filter row is enabled and there are INPUT filters.
– Fixed an issue in jqxGrid when caps-lock is on and you start editing with a key press.
– Fixed an issue in jqxGrid when columns reorder is true in RTL mode.
– Fixed an issue in jqxGrid regarding DatetimeInput editor when it is in time-input mode.
– Fixed an issue in jqxScheduler regarding the agendaView usage on touch devices.
– Fixed an issue in jqxListBox about submitting item value when the listbox is empty.
– Fixed an issue in jqxDateTimeInput regarding showing time popup with Alt + Down key, if calendar button is hidden.

The post jQWidgets 4.5.3 appeared first on Javascript, HTML5, jQuery Widgets.

Using jQWidgets React Components with Create-React-App

$
0
0

What is Create-React-App


Many React developers wanted to have a React Enviroment where they can focus only on their code, having all the configuration files like webpack, babel, react pre set-up.
create-react-app comes in strong here. When you install it all the config files are hidden so you can start working on your application right away. Of course if you want to pull out all of the configuration files, then the eject command comes in. With it you can further tweak your configuration.


Installing Create-React-App


Assuming we already have node installed, run the following comamnd in our terminal:


$ npm install -g create-react-app


Creating an App


To create a new app, run the following command:


create-react-app my-app


It will create a directory called my-app inside the current folder. Inside that directory, it will generate the initial project structure and install the transitive dependencies:


No configuration or complicated folder structures, just the files you need to build your app.


Now in order to start the app, run the following command:


npm start


This runs the app in development mode.
Open http://localhost:3000 to view it in the browser.

The page will reload if you make edits.
You will see the build errors and lint warnings in the console.


Integrating jQWidgets React Components


  • Create jqwidgets-react folder inside the src folder and add the needed react_jqxXXXX.js files in it:

  • Create jqwidgets folder inside the public folder and add the needed jqxXXXX.js files in it:

  • Inside index.html file add the needed jqxXXXX.js references:

         
    <!doctype html>
    <html lang="en">
    <head>
    <meta charset="utf-8">
    <meta name="viewport" content="width=device-width, initial-scale=1, shrink-to-fit=no">
    <link rel="manifest" href="%PUBLIC_URL%/manifest.json">
    <link rel="shortcut icon" href="%PUBLIC_URL%/favicon.ico">
    <title>React App</title>
    <!-- jQWidgets -->
    <link rel="stylesheet" href="./jqwidgets/styles/jqx.base.css" type="text/css" />
    <script type="text/javascript" src="./jqwidgets/jqxcore.js"></script>
    <script type="text/javascript" src="./jqwidgets/jqxdatetimeinput.js"></script>
    <script type="text/javascript" src="./jqwidgets/jqxcalendar.js"></script>
    <script type="text/javascript" src="./jqwidgets/jqxtooltip.js"></script>
    <script type="text/javascript" src="./jqwidgets/globalization/globalize.js"></script>
    </head>
    <body>
    <div id="root"></div>
    </body>
    </html>
  • Finally inside App.js file write your widget code:

     
    import React, { Component } from 'react';
    import JqxDateTimeInput from './jqwidgets-react/react_jqxdatetimeinput'
    class App extends Component {
    render() {
    return (
    <div>
    <h4>My First jQWidgets React Component</h4>
    <JqxDateTimeInput width={200} height={30} />
    </div>
    );
    }
    }
    export default App;

And here is the output:


Conclusion


So you’ve made your application with webpack, babel and everything else all figured out and installed for you. You just added the needed files, wrote some code and the application was ready to go! If you consider building a React application create-react-app is one of the best starter projects you can use.

The post Using jQWidgets React Components with Create-React-App appeared first on Javascript, HTML5, jQuery Widgets.

JQWidget-based GUI usage in an App

New Angular 4 Demos

Viewing all 306 articles
Browse latest View live